MON - FRI: 9:00 to 7:00 EST
Add Current Year to WooCommerce Emails using YayMail
In WordPress, shortcodes are a powerful feature that allows you to add dynamic content to your posts, pages, or widgets. In this tutorial, we will walk you through the process of adding a custom shortcode to add the current year to WooCommerce Emails using the YayMail – WooCommerce Email Customizer plugin. By following these simple steps, you’ll be able to show the current year dynamically on your WooCommerce emails without any manual updates.
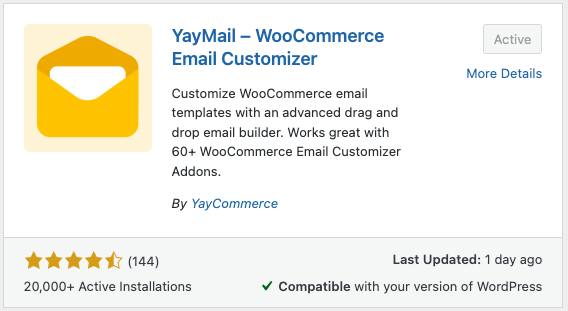
Step 1: Install and Activate the YayMail – WooCommerce Email Customizer Plugin
Before adding the custom shortcode, you need to install and activate the YayMail – WooCommerce Email Customizer plugin. This plugin enhances the customization options for WooCommerce email templates.
- Log in to your WordPress admin dashboard.
- Navigate to “Plugins” and click on “Add New”.
- Search for “YayMail – WooCommerce Email Customizer”.
- Click on “Install Now” and then “Activate” to activate the plugin.
Step 2: Access the ‘functions.php’ File
To get started, you need to access the functions.php file of your WordPress theme. This file is responsible for managing various functionalities of your theme.
- Log in to your WordPress admin dashboard.
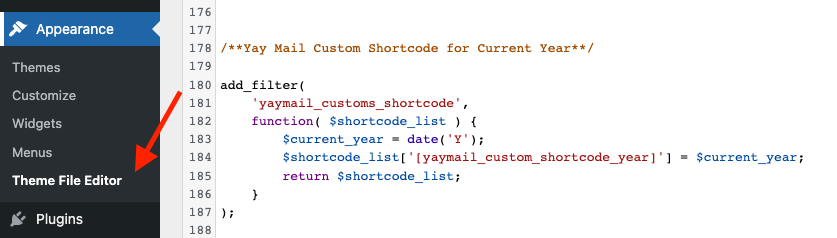
- Navigate to “Appearance” and click on “Theme Editor”. Make sure you have the appropriate permissions to edit theme files.
Step 3: Locate and Edit the ‘functions.php’ File
Once you are in the Theme Editor, locate and edit the functions.php file. It is typically located under your currently active theme’s folder.
Step 4: Add the Custom Shortcode Code Inside the ‘functions.php’ file
Add the following code snippet:
add_filter(
    'yaymail_customs_shortcode',
    function( $shortcode_list ) {
        $current_year = date('Y');
        $shortcode_list['[yaymail_custom_shortcode_year]'] = $current_year;
        return $shortcode_list;
    }
);
This code registers a custom shortcode [yaymail_custom_shortcode_year] that will display the current year dynamically.
Step 5: Save the Changes
After adding the code, click on the “Update File” button to save the changes made to the functions.php file.
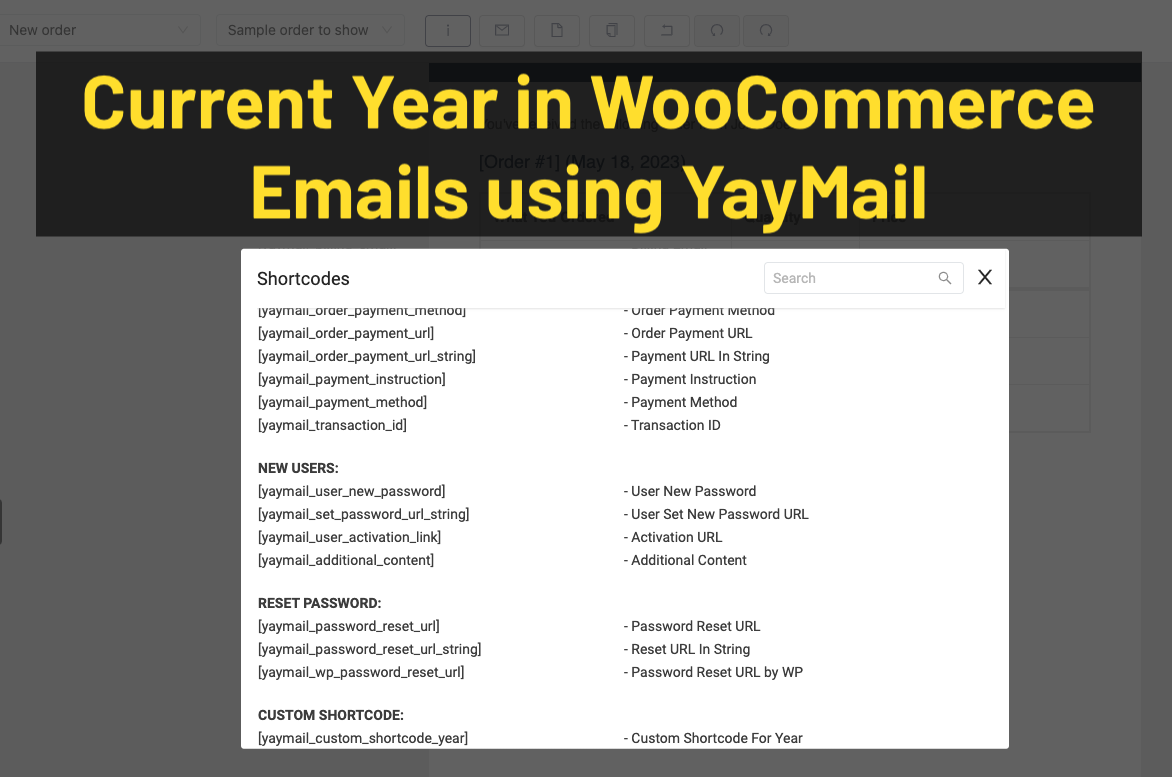
Step 6: Utilize the Custom Shortcode
Now that the custom shortcode has been added, you can use it within the email templates with YayMail – WooCommerce Email Customizer plugin.
- Navigate to “YayMail” in your WordPress admin dashboard.
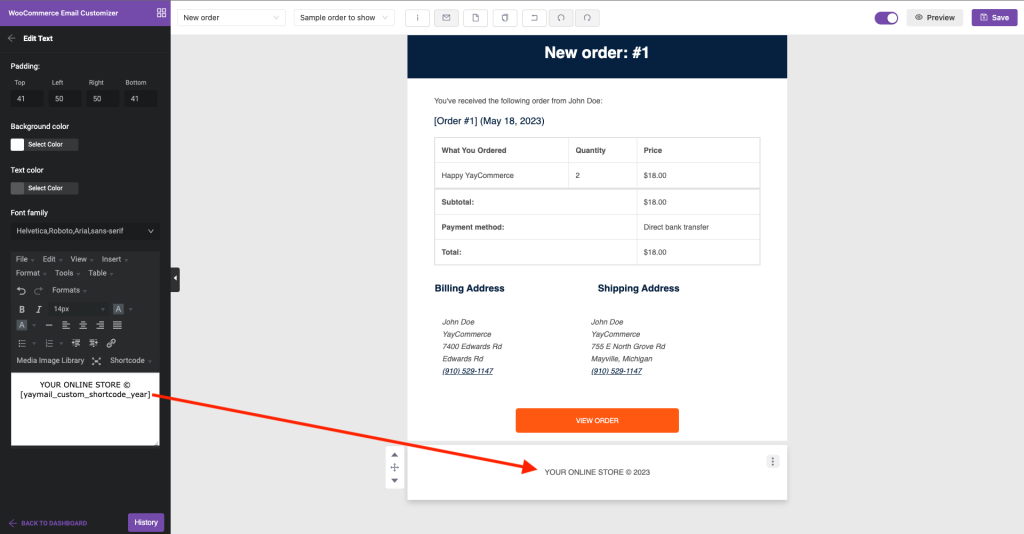
- Customize the desired email template that you want to include the current year in.
- In the email template editor, insert the shortcode
[yaymail_custom_shortcode_year]at the desired location. - Save the changes to the email template.
Conclusion
By following the above steps, you have successfully added a custom shortcode to display the current year in your WordPress site using the YayMail – WooCommerce Email Customizer plugin. Now, your WooCommerce email templates will automatically show the current year, providing a dynamic and up-to-date experience for your customers.
Looking for expert assistance with WordPress, WooCommerce, or email customization? Look no further! At Webmaster’s Desktop, our experienced team is here to help you overcome any challenges you may be facing. Whether you need help setting up your WordPress site, customizing your WooCommerce store, or enhancing your email templates, we’ve got you covered. Contact us today and let us handle the technical aspects while you focus on growing your business. Unleash the full potential of your online presence with Webmaster’s Desktop.